Showing posts with label Photography. Show all posts

Thursday, 25 January 2018

Size Comparison from Above


Back here I presented a manifesto for RealRobo.

In the comments, I was asked to take a shot from above. The days in London have largely been dull and overcast, but when the sun did come out I took the opportunity to take this shot.

Task completed.
   

Friday, 12 January 2018

Size Comparison: Real Robo Manifesto!

 
Click on this to see the full size 1764 x 1091 image.
  
After I posted my last blog it raised a comment about sizes, with one person coming out with the informed opinion that tracked or wheeled vehicles were just smaller, period. Walking vehicles are, and would always be too large to ever be practical.

This is one of those areas where peoples opinions are informed by a wide range of media, where the representation of walking vehicles goes from the sublime to the extreme. Gundam mobile suits are at the sublime end of the largeness, while the Gunbuster suit is at the mind blowing extreme end.

However, there is Real Robo.

Mobile Suit Gundam: The 08th MS Team combat armour suits occupy the very big end of the Real Robo spectrum. The suits in Fang of the Sun Dougram are the size most people assume combat armour is. Dougram provided a large number of designs that were used in the BattleTech game, as did Super Dimension Fortress Macross aka Robotech. While Fang of the Sun Dougram remains one of my favourite anime shows, what inspired me to consider walking vehicles in a more serious light was Armored Trooper VOTOMS, which also has a TV Trope page.

The arguments all boil down to size. And size matters.

In the real world, smaller is better.

I can see how all of the above makes Real Robo a confusing hot mess of different concepts. I really do.

Especially, given that people watch the anime shows or play games with miniatures. The trouble is that wargame models are not to a scale, but made to a size. This distorts the proportions, and again leads to erroneous assumptions about the size of combat armour suits; Heavy Gear being one example of how the models are sculpted for the look on the table.

Fortunately, being crazy about Real Robo and VOTOMS, I have scale models by Takara of both the VOTOMS heroes combat armour suit, called a ScopeDog, and an Abrams tank. As you can see, the ScopeDog is taller than the tank. But, not by as much as one might have been led to believe.

To me, this is what I mean by Real Robo.

So, to be clear, Bad Dog is a  hard SF take on Real Robo. It takes the ideas of Armored Troopers VOTOMS, and turns up the hardness to eleven.

BTW: As promised, I took two pictures to show the difference when taking pictures in Hi-Res versus stacked images. The picture at the top was taken using the Hi-Res mode of my camera, the picture below was made using multiple exposures stacked together to form one image. Both models are on bases to equalize their heights off the ground.

Click on this to see the full size 909 x 603 image.
    

Monday, 1 January 2018

Happy New Year - 2018

 
Olympus 7-14 zoom lens at 7mm. Crop from a quick 16 image stack, F5.6, 1.3 secs, at ISO 200.

A Happy New Year to all my readers. May you find fulfillment in all your endeavours, however great or small.

This year sees for me the end of a two year period of working in the NHS. My contract has now ended, and it gives me the opportunity to focus on my goal cementing my goal of being a published author. I realize, on reflection, that time is the most precious commodity one has, and I'm driven to make the most of the time I have to achieve my goals.

I'm not one for making New Year resolutions, because I know that such things generally are counter productive, unless one is willing to make big changes and drive yourself hard. This year I want to commit myself to making changes and I'm prepared to drive myself hard to do so.

My first novel, Bad Dog, is out as an eBook, and by the end of the month I hope to have a paperback and hardcover versions for sale. Furthermore, the sequel, Strike Dog, will be available soon. Just got to commission a cover, oh and do all the niggly bits like typeset it, and stuff. But I know how to do it now, so it will be done. Then before the end of the year I will bring Ghost Dog to market.

But, while this means I will do less model making than I might like, it doesn't mean an end to my hobbies, because everyone needs a hobby. Back here I talked about getting a new camera, now I have my new lens, courtesy of my beloved, more about it on my other blog.

Above is a quick stack of 16 images I took on Christmas Day. And, I've taken away one lesson, with an ultra-wide angle lens one doesn't need to take more than half-a-dozen pictures to get everything in focus.

Wow. If you know anything about photography, that's definitely a thing!

So, I'm excited by this picture, because it combines two of my hobbies. Combining two hobbies is both satisfying and inspirational. My plan is to take a 40mb Hi-Res single image and a stack of 16mb images, of the same scene under better lighting, to compare the results from the two different two modes.

The reason being that doing one 40 mega-pixel shot would be quicker than taking multiple 16 mega-pixel pictures and stacking them into one image.

Exciting stuff! See you all on the bounce.
  

Friday, 22 September 2017

SJG Ogre Miniatures Wargame


This piece is going to be a criticism of the Ogre Miniatures wargaming rules by Steve Jackson Games.  If you've followed my blog for any length of time it should be obvious that I have played a fair few game of Ogre/GEV, and have a sizeable collection of the miniatures.

The picture above is proof of that.

Let me start by stating the obvious, the board-game is a classic.  Now that has been said let me explain what makes the rules for playing using the miniatures less than a fully satisfying miniatures playing experience.

It's quite simple really, the photo above is almost the perfect illustration of the problem–range to move ratio.  It doesn't matter what ground-scale conversion one uses: one inch to the hex, two inches, three or even four the problem remains, and the larger you go just makes other things more difficult too, like the size of the table need to play on.

In Ogre, units move one to four or more hexes per turn.  The range of the weapons is one to three hexes, with specials like howitzers being an exception, and cruise missiles of course, which in my experience are scenario specific.  Also, in Ogre terrain blocks, as in costs movement points to cross, but line-of-sight is is irrelevant to targeting an opponent, as it is abstracted as a defence bonus.

So what's the problem?

When the distance you can move a unit is as great or greater than the range you can shoot, what you have is a high level (more abstract) game, and miniature wargaming tends towards a lower level (less abstract) game.  The move to range ratio is a big issue here, because it just doesn't give the feel of a miniatures game.

As a player of miniature wargames I want tactical problems arising from terrain blocking line-of-sight and manoeuvre, which is why I use my miniatures as tokens on a hex map board.
  

Monday, 6 February 2017

More BattleTech Alpha Strike Pictures


These are a selection of the pictures that were not used in Miniature Wargames magazine the other month for the Alpha Strike article.  Atlas versus Locusts is in my mind the classic BattleTech what if fight.


I supplied a lot of duplicate shots for the article, as in featuring the same mechs, but from a different angle to the pictures shown here.  These are I think the best versions.  House Steiner quads moving into a flank attack.


Though I can see why the picture above wasn't used, because it doesn't have a central focus to the action, it catches the swirling mech-on-mech action that Alpha Strike can deliver.


However, I really liked the picture of the two Locusts advancing, even if there isn't really a lot else going on in the picture.  So now I get my chance to show it.


Again this picture composition is a bit lacking, but House Steiner and industrial mechs with infantry milling around their feet says BattleTech.  I hope you all have enjoyed this small peak into the assignment I undertook, and thank you for taking the time to look.

And that's all folks.
  

Wednesday, 11 January 2017

Miniature Wargame Issue 406


All the models, buildings and terrain were assembled and painted by me.

There are some BattleTech pictures I took for an article on Alpha Strike by Joe McCullough in the upcoming issue #406 of Miniature Wargames.  A preview of the contents can be found here.  Once I know what pictures I took that weren't used I will post them for everyone to see.

NB:

American readers can get Miniature Wargames from On Military Matters:
Web: onmilitarymatters.com
Email: militarymatters@att.net
Phone: 609-466-2329

The cheapest and quickest way for overseas subscribers, is to subscribe to our digital edition. The digital edition is accessible across all devices through Pocketmags: https://pocketmags.com/how-it-works.

There is currently a sale available to customers who purchase via the Pocketmags site, until 15th Jan link–customers can save 37% on the full price for the year–that's 12 issues for just £33.99 GBP. We also have a 99p single copy sale running until the end of the month should the customer wish to try before they buy–this is available on back issues only.

Miniature Wargames do offer print overseas subscriptions – but it's quite a step up in price due to the postal fees. link £76 GBP per annum for US customer.
   

Thursday, 14 July 2016

Newten Town Hi-Res versus Focus Stack

This is taken from a Hi-res image (6775 x 4192 crop from a 9519 x 7314 original) with the camera set to ISO 200, lens aperture F8 at 0.6 seconds, resized to 1400 x 866 pixels (click on image to see full size).

For the past few months my hobby focus has largely been on taking pictures with my new Olympus OMD EM5 Mark 2 micro four thirds camera.  One of the reasons I chose the camera was because it features a 40 megapixel Hi-Res mode, which I thought was super awesome.  It is, but after months of practice I've come to the conclusion that the really super awesome feature of my camera is the automatic focus bracketing feature, which was a firmware upgrade that the reviews I read didn't mention.

That's serendipity for you.

I've been sorting out some terrain and changing the graffiti I wrote on one of the building from FA*M Will Set You Free to Death Will Set you Free – driven by a friend who was playing in my old campaign who read FA*M as Football Association, rather than Freedom Army, which rather spoiled the effect that the graffiti was suppose to have for me.

And this is a crop from a focus stack made from 25 images (3232 x 2129 crop from a 4668 x 3356 original), again the camera was set to ISO 200 (best quality), lens aperture was F4 and each image was taken at 1/4 of a second, resized to 1200 x 790 pixels (click on image to see full size).

The re-write involved sanding down the original letters to, to remove them, and then repainting the wall.  As I didn't want to go to all of the effort it would require to repaint the wall to the original colour I took a short-cut and repainted it red.

I've been trying to do a real comparison of the advantages and disadvantages of using the Hi-Res mode of my camera, and the pictures in this post have been re-shot several times to get results I was happy with, and proving that I'm not as good as photographer as I like to think I am.

This is a 1027 x 1210 pixel crop from the 40 megapixel Hi-Res image.

In some ways the results of this comparison are a little disappointing because the depth of field at F8 is insufficient to meet my needs, even thought the out of focus background is quite nice the lack of sharpness across the model is telling.

This is a 777 x 831 pixel crop from a 16 megapixel focus stack.

Looking at the pixels, by taking a full size crop from each image, I think it's quite clear that the focus stack has produced the sharper looking image, and if I wanted to blur the background it would be possible to remove images from the stack to achieve the effect.  So for now, until Olympus offer a firmware upgrade that allows automatic focus bracketing in Hi-Res mode, focus stacking 16 megapixel pictures is the way to go.

Monday, 13 June 2016

Megapixels


Twelve versus sixteen megapixels from two different micro four thirds cameras showing same pixel area.

Not all pixels are equal.

I say this, because it's true, if little understood by the non-photography enthusiast.  Understanding why all pixels are not equal is relatively easy explain but, and it's a big but, the explanation requires the willingness to come to grip with things like F-stops and ISO numbers.

F-stops are an abbreviation for the ratio between the focal length (the F in F-stop) of the lens and the size of the aperture and the corollary that one has to have larger lenses for larger sensors.  The F-stop numbers are actually shorthand for one over the number, so F2 is a bigger aperture than F16 because a 1/2th is bigger than a 1/16th.  Therefore the F-stop describes the size of the aperture that governs the amount of light that passes through the lens onto the sensor.  The squiggly math can be found here.

The thing to takeaway is that the more light you let through the lens the better, and bigger lenses let through more light, but everything has a price, which is that the lens is physically larger too.

Then there is the sensitivity of the sensor, which is described using what is called an ISO number.  The three letter abbreviation comes from the International Organization for Standardization, see here.  In short, it's a measure of how well the sensor reacts to light and it tells you how sensitive the sensor is.  But, the higher the number used comes at a cost in image quality – usually noticeable as visual artifacts when there's not enough light to resolve the image being taken.  Ideally what one is looking for is a sensor with a low number like 100 ISO that has a large range that goes up into the thousands.

However, all of the above is relative to the sensor size and the number of pixels it has.  So it should be obvious that a big sensor with the same number of pixels as a smaller sensor means that the pixels are not the same size, and worse still, the amount of light gathered by the lens falling on said sensor is not the same either (if that doesn't make sense – remember that big lenses let through more light through them).

The difference in the ability of a large lens versus a small results in some thing that's called equivalence.  A large frame, 35mm film equivalent film camera, that has an F2 lens will be letting in two stops more light than a micro four thirds camera (equivalent to a half frame from a 35mm film camera) fitted with an F2 lens; or if you prefer the micro four thirds camera's F2 lens is equivalent to a full frame lens at F4.

That's probably confused you unless you're already savvy with cameras and lighting. So what does this all mean for the non-enthusiast user?

Here's a handy-dandy table to confuse matters by over loading you with lots of numbers.

Click to see larger picture.

TL;DR:  The size of the aperture in relation to the size of the sensor matters.

So, if you're using your camera phone, which because it has a small sensor (the smallest frame size in the illustration above), and because a small lens effectively provides a wide angle of view, it will be easier therefore to take pictures of small objects and have more in focus.  But despite whatever the it says about the number of megapixels, because the sensor is so small, you'll be unable to produce high quality big pictures, which may not be a problem if all you do is post to the web.
 
Here's a simple illustration that compares the size of the sensor of a full-frame camera down to a smart-phone.  Here you can see the big difference there is is sensor size.


Now what this means, bottom line if you like, is that light is everything when it comes to taking pictures.  Also, bigger cameras capture more light, and don't be sucked into the more megapixels is better, if all things are equal, the size of the pixel really does matter when it comes to quality of your pictures.  This is what drives the image quality, which is also called picture noise comes. These are the artifacts or blurring you see when you enlarge a picture, which can be understood if you remember noise is defined by the ISO number of the camera.

TL:DR:  Lots of megapixels on a small sensor are not as good as less megapixels on a larger sensor because bigger pixels are better.


Thursday, 7 April 2016

16 Megapixel Wide Angle Stack

When I was out the other day with my partner shopping in the West End we happened to go in the Halls of Mammon, more commonly known as Selfridges department store. Initially this was to have a coffee break and use their facilities, but ended up in our wandering around for a bit looking at kitchen utensils when we found the photography department.

It impressed us.

Not the prices, as they were for the most part full retail, but because they had a pretty full selection of all the major brands on cameras: Nikon, Leica, Hasselblad, Sony, Canon, Fuji, Panasonic, Tamron lenses, Manfrotto tripods and Olympus cameras plus other things like accessories.

All in all a one stop shop for the photography enthusiast.

I of course was drawn the the Olympus section while my beloved nosed around the Nikon cameras and lenses. Afterwards we had quite a lengthy discussion on the various lenses we had seen; the Olympus ones in particular we had only seen pictures of on the internet. My question being around wide-angles and whether one should get a prime or a zoom.  I quite fancy, as in I'm saving up for, the F2 20mm wide angle but I'm also very tempted by the 7-14mm F2.8 zoom that Olympus offer.

Today's post is a test of the assumptions we discussed on our walk.

Would a picture taken with a wide-angle zoom be of a good enough quality?  Now I don't have the 7-14mm but I do have the 14-42mm pancake zoom that Olympus make.  It's considered a kit lens: as in an all round cheap zoom, and I haven't seen a thorough review of it done by DXOMark, which is not that unsurprising really as by their standards it is cheap and cheerful.

I'll let you all be the judge but I have to say that I was surprised and impressed by the results.

The colours are slightly different because these were taken under artificial light and I obviously didn't adjust the pictures to match.

You can compare these with the shots I took with my 60mm macro here.

Friday, 1 April 2016

40 Megapixel Focus Stack

E-M5 Mark II with Olympus F2.8 60mm macro lens: ISO 200, 0.3 seconds at F8, 191.2mb RAW files processed using Silkypix +0.5 exposure, 25 HDR, 15 black – 8 picture stack processed in Helicon Focus and cropped to 8902 x 5021 179.3mb TIFF, saved as a 832kb JPEG using Graphic Converter.

And now, after much trial and error, some computer hang ups as my poor little Mac Mini struggled to process the files, the above picture is taken from a 40 megapixel stack made up from eight 191.2mb images.  You can click on these to see them larger.

TIFF crop 39mb 3117 x 3106 pixels saved as a 809kb 900 x 871 JPEG using Graphic Converter.

TIFF crop 16.8mb 2279 x 2464 pixels saved as a 831kb 875 x 946 JPEG using Graphic Converter.

The 39mb image is so large that it's possible to take crops without loss of quality.  Finally, just to show what an un-resized crop looks like.

TIFF crop 4.9mb 1192 x 903 pixel saved as a 889kb 1192 x 903 JPEG using Graphic Converter.

TIFF crop 4.9mb 1207 x 903 pixels saved as a 1mb 1207 x 903 JPEG using Graphic Converter.

 I'm impressed.

Friday, 25 March 2016

E-M5 Mark II versus DMC GF-1 Shoot off

I thought it might be useful to compare straight pictures taken by my Olympus OMD E-M5 Mark II versus those taken by my old Panasonic Lumix DMC GF-1.  These three shots are full frame JPEGs from TIFF files saved off the original RAW files all saved to be the same file size.  The difference in pixel count being down to the compression algorithm.

First up, my old Panasonic Lumix DMC GF-1 shooting a 4000 x 3000 picture, 12 megapixels.  A 36.2mb RAW file was saved as 1mb JPEG, which produced a 1262 x 946 pixel picture.

Next my new Olympus OMD E-M5 Mark II shooting in the Hi-res mode 9612 x 6912, 40 megapixels.  This results in a 191.2mb RAW file saved as 1mb JPEG, which produced a 1490 x 1117 pixel picture.


You should be able to click on the pictures to see the full size image.

1202 x 903 crop from 12 megapixel original.

All the pictures were taken using my Olympus M. Zuiko F2.8 60mm macro lens, which is the class leader for micro four third cameras.  They were also taken on a tripod using cameras self timer to reduce camera shake.

The three shots were taken one after the other with the lens set at F8 using aperture priority.  Both cameras were manually set to ISO 200, but the E-M5 Mk2 used a shutter speed of 0.4 (2/5ths) of second, while the DMC GF-1 used 0.25 (1/4) of a second.  The difference in the shutter speeds could be down to either the light changing or the way the two cameras metering systems.

I hadn't thought to account for this, which is why I appreciate DP Review and DxOMark for there laboratory shots when they test cameras.  It's harder than it looks to account for all the confounding variables and I certainly don't have the time and resources to match the professionals.

The next three shots below are crops taken from the TIFF files, which is what you get when you save process the RAW files into an image.  The pictures below are as close as I can get to identical pixel size using my cropping tool.

1203 x 904 crop from 16 megapixel original.

1203 x 904 crop from 40 megapixel original.

OK as you can see the crop is rather cruel to the 40 megapixel shot.  But if I crop the 12 megapixel shot to the same area and you click on the pictures you should be able see the real difference.

521 x 397 crop from 12 megapixel original.

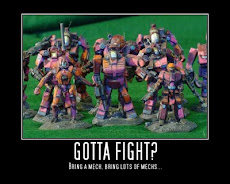
And that's it.  Buy a great camera and make you models look like really rough.  I will remind everyone that these miniatures are 28 mm tall.

Thursday, 24 March 2016

On My Workbench


I've been chilling out today or chillaxing as the kids like to say.  I needed to unwind from work and have been messing around with my new camera, taking some shots.  In the process of poking around the menus I found that the latest Olympus firmware upgrade to version 2.2 had added focus bracketing.

It's not mentioned in the official manual or the after market manual so I had to play with it and take a bunch of shots, most of which I threw away, as one does when one is testing out a new feature, but below is a a 18 picture focus stack compiled from 25 automatically taken pictures (I processed the stack using all 25 images but decided that I wanted more of the background to be out of focus and removed seven images).


Click to see bigger image and admire the depth of field: nine inches front to back in focus.

As I've said already my OMD E-M5 Mark II is a computer that takes pictures.  Also, while this new feature is a fantastic addition it's not fully integrated into the operating system: as in I can't choose it and set the camera's self-timer or more importantly use it in hi-res mode.  Hopefully Olympus will rectify this shortcoming in future firmware updates.
    

Saturday, 5 March 2016

40 Megapixels Quick Test Shot

   
E-M5 Mark II, Hi-Res mode 9216 x 6912, ARGB, with M.Zuiko 60mm F2.8. Auto WB, Auto exposure, ISO 1600, 1/5th of a second at F4.  RAW 100mb image processed using SilkyPix version 6.1.25.0. This is a 2939 x 3083 TIFF cropped down to make a 1050 x 1102 JPEG.

As you all may have read I have a new camera.  If you haven't, and this news comes as a surprise, then click here.

I had been dipping in and out of Darrel Young & James Johnson's book Mastering the Olympus Olympus OMD E-M5 Mark II for a about a week after getting my new camera.  The book isn't what you call light reading, but made myself I sit down and read it from cover-to-cover, though I will freely admit I skipped parts that were of little interest to me for example, film, art effects and scene's.  I placed a number of Post It tags and even labelled them for later quick access.

So, after a morning spent in bed reading, with both the book and my camera next to me at hand to run through the instructions I set my camera with all my settings as MySet 1.  After that I programmed the Mode dial so the Art setting now turns on the Hi-Res mode as MySet 2, which felt awesome.  Needless to say by the time I had finished setting up all the menus the battery needed recharging.

Then I befuddled myself by changing my mind and turned off the Hi-res mode, and it's not exactly intuitive that you have to go back into the menu and turn it on again when it seems to show it is set to on, but is actually off.  After a couple of days of anxiety fretting what I had done to my new camera, fears of having bricked the Hi-res mode, I re-read the manual and was able to switch the Hi-res mode back on.

Next I will be doing a shoot off to compare my E-M5 Mark II against my old DMC GF-1.

TL;DR:  The image was taken under a 60 watt bulb with the lens opened up and a really slow shutter speed.  The big thing is the larger file size means a bigger image.
 

Tuesday, 16 February 2016

Camera Upgrade


My new Olympus OMD EM5 Mk2 Titanium.

After nearly five years of using my Panasonic Lumix DMC GF1 I'm upgrading my camera system.  I got this as a present from my partner for my birthday, which is today, and is a significant double-digit number.  I've been spoilt rotten and I love her for it.

The last time I talked about upgrading my camera system was here.  This is a big deal, because photography is a thing for me, like breathing is a thing – can't live without it.

Anyway, my new micro four thirds camera normal resolution is 16 megapixels.  Lots of reviews on the web.  But what attracted me to it was the fact that it can take 40 megapixel still life pictures through a clever multiple exposure trick that moves the sensor between shots.  It's a good thing.  Especially good if one wants to take high resolution pictures of small toy soldiers.

The difference between my new Olympus OMD and my old Panasonic Lumix is that the latter was a digital camera while the former is a computer that takes pictures.  Colour me over excited.  Fortunately, I have an after market manual to help me learn all the functions, and I can't wait to take some pictures with it and post them here.

So far I managed to set the time and date.  As the saying goes, I may be some time.
  

Friday, 17 July 2015

CASE-2X Portraits


This was going to be a post about taking pictures, and how to up you game, but my game is so good that even when trying to show the problems I failed to produce pictures that were significantly lacking in depth of field.  As a result I went off and had another go and producing the images I needed and found I had written the basics for a short article.  I talked to Henry Hyde and he said go for it, so rather than appearing here my article on upping one's photographic game will be sent to Miniature Wargames & Battlegames magazine.

So what you see here instead are some nice portrait shots of my Bad Dog CASE-2X mecha on a piece of my terrain.  And the first close-up is of Lt Tachikoma's CASE-2XC.


And below is the close-up is of LCpl Kowalski's CASE-2X.

 
Before I finish I just want to show you all a side-by-side comparison of two shots.  The one on the left is a single frame, and the one on the right is made from a stack of images.  One can just about tell the difference in the quality between the two methods of taking a picture.  You'll all have to trust me when I say the image on the right is sharper.


This really is a case of one can't see the difference unless one is looking at the hi-res images on one's monitor, and know what you're looking at, because I'm reaching the pixel resolution of my screen.
  

Thursday, 9 July 2015

Painting: Reflections on Progress


Here is a nice picture of my original Pink Panther battlemechs that I painted back around 1990.  This is the full shot of the blog's motto picture; Gotta Fight? Bring a mech. Bring lots of mechs...  Hard to believe now, but back then I actually won first prize in a painting competition at the Colours Wargame show in Reading when it used to be held in the Hexagon centre.  I post this as a reminder not to think too highly of one's own work, but also because painting models, and taking pictures of them is a journey in its own right.

Back here I talked about getting a new camera.  Itself a journey from my beloved Pentax MX 35mm film camera to using a Sony Cyber-shot DSC-V1 digital camera, and then to acquiring my current Panasonic Lumix DMC GF1, which is a micro four thirds format SLR (single lens reflex).  Since first getting this camera I've been very lucky to have been given an Olympus M.Zuiko 60mm F2.8 macro lens.

The following photographs on the left were taken with the Sony Cyber-shot DSC-V1, while the ones on the right were taken with Panasonic Lumix DMC GF1.


Not only has the quality of the picture improved, but the painting too, largely driven by seeing the pictures of my work.


At one point I had this crazy idea to repaint all my Pink Panther mechs, and add decals to make them pop more.  I did these three mechs, and even painted a couple of new Bushmen up, but then the project ran out of steam.  For the usual reasons; lack of motivation.


Still, looking at these pictures of before and after I'm inclined to think that in the long run I may come back and finish repainting the rest of the mech company, after all it's only a dozen models.  I'd have more motivation if I were playing BattleTech.  Still mustn't grumble, but rather try to play more games.

Besides that I have some ideas about writing up how I now take pictures to improve my model making, which may mean I will end up finishing this project off or not.  Whatever happens I will have me some fun...
   

Wednesday, 28 September 2011

IABSM 3 Teaser


Breaking news just in from TooFat Lardies...

The rules are 104 pages long, full colour. The contents are as follows:

1. Introduction
2. Contents
3. Playing the game
4. The basics
5. The Game Deck explained
6. The Rules
7. Optional Rules
8. Aces
9. Recruiting Your Force
10. Normandy Handbook (Brits, Germans and US for Normandy with orbats, stats etc.
11. Random Scenario Generator; 6 types of random scenario, infinite variety of games
12. Historical scenarios, how to write them and balance your forces
13. Two starter scenarios
14. Two historical scenarios

Richard Clarks said "The cards arrived from the printers yesterday. The tokens are being made, and Hugh Jarce is being cast."

I can't wait to see these rules, just feels so exciting. Previews of the layout look really polished and I think this is going to be the must have WW2 rule set, and I hope to steal loads of ideas from it for my own games.
   

Sunday, 11 September 2011

Weekend Photoshoot


Been a bit of a busy weekend for me as I went up to St. Albans Saturday morning to shoot a few photographs for Richard at TooFat Lardies for his forthcoming I Ain't Been Shot Mum 3. He says he is pleased with what I did, but for me the proof of the pudding will be seeing the end product etc.

For me the photo shoot was quite stressful, because it has been an awful long time since I've taken pictures on any sort of commission basis, and it was a lesson in how stress makes you forget things. However, in spite of all that I took 94 pictures in an hour and a half, which was all the time we had, because the hall was booked for use by another group.

Some are appallingly out of focus, and other have camera shake to die for, when one take 94 shots one is bound to get a few good ones. I just hope that I got enough good shots for Richard to be happy and able to proceed with producing the rules.

I've been looking at the manual and dummies guide I bought to refresh what I need to know to get the maximum out of my camera. Oh ye,s some very cropped teasers for your delight.


Enjoy.

PS: I'm really excited by these rules and I don't even play WW2, but I can see I'll be using them for modern actions though.